Tuesday, November 26, 2013

Nail Post - Super Simple Nude Nails

Since nail art is what got me started on social media, I figured I should do more nail art posts. So here is a really easy nail art pictorial for those of you who want something cute and simple. I was inspired by a screenshot I had taken AGES ago by a Thai nail artist on Instagram called nailmarco. I screenshotted the image over a year ago and by then the picture was already 14 weeks old haha. But I loved them because they were so sleek.

Here is his original design, and below is my pictorial to achieve this design.

Supplies:

  • Base Coat
  • Nude Polish
  • White Striper
  • Glitter Striper
  • Top Coat
Step 1: Apply a single coat of base coat to protect your nails and give your polish an even surface to lay on. I used the same base coat I always use, the Sally Hansen Hard as Nails.


Step 2: Apply 2 thin coats of your nude polish. I used Julep Otte from the 2012 Trina Turk Collection. 


Step 3: Using the white striper, make curves and "S" shapes on the nail. Some ends should be thicker than the other. I used the Color Club Art Club striper in White.


Step 4: Repeat step 3 using the glitter striper. 


Step 5: Apply your favorite top coat. I used the Julep Freedom Polymer Top Coat.

Here is the finished design. I hope you enjoyed! Come back and see me!


Kiss, Kiss.
-A

Wednesday, November 20, 2013

Haul Post - Ballin' On a Budget!

I know I'm not the only one out there that can't afford Mac and Nars and YSL.
Almost all of my makeup is from the drugstore except for a few select things that I've grown to love like my Mac Pure Zen lipstick and my Sheercover foundation and primer. The most I've ever spend on a single makeup product is the $22 I spent on my Sheercover foundation. It's not that I'm cheap (I may be but we will see about that), it's that I don't have a lot of extra money laying around to buy cosmetics and beauty products with.

I already said the vast majority of my makeup is from places like CVS and Walgreens and Meijer, but sometimes I will find some amazing things at the dollar store too. The Dollar Trees in my area have started carrying elf and LA Colors as well as some Milani and Maybelline items. And since they're at the dollar store, guess how much they cost... ONE DOLLAR!!!! You can't beat the price, and stuff you find there isn't bad, especially if you're a beginner to makeup or just don't have a lot of extra cash.

So all of the items in this blog post were found at a Dollar Tree or at a Five Below.

The Goods:

e.l.f. Natural Lash Kit - 1$
These, you can pick up at the dollar store, Target, or online on the e.l.f. website. They're good for beginners to falsies. The lash glue sucks though haha. For that I would recommend Duo Lash Adhesive.


L.A Colors 3 Color Eyeshadow in Iris - 1$
Also found at the dollar store! The palette is small, compact and sleek looking. It comes with a sponge tipped applicator, but I usually throw those away.


e.l.f Matte Lip Color in Coral, Natural, and Praline - 1$ each
Go Dollar Tree! These retail for 3$ each on the e.l.f. website. So I totally got these for a steal! They're skinny lip crayons that twist up. The colors are all really similar, but they are good everyday lip colors that aren't super dry.


L.A. Colors Value Kit  in Glisten - 1$
If you think I got this at the dollar store then you're really smart! This value kit has 2 mini blushes and a little brush. The brush is going to my 3 year old but I'll get some use out of the blushes. One shade is a bright pink and the other is a dusty peach with a slight shimmer.


e.l.f. Essential Bronzer with Brush in the shade Bronzed - 1$
I picked this one up from the dollar store, too. The e.l.f. website lists it for 2$, so I saved a dollar on this. This bronzer has the tiniest hint of shimmer in it which makes it good for everyday use. e.l.f. does offer it in a shade darker, but for finding the second darkest shade in a Dollar Tree, I think it's a great find.


e.l.f. Essential Blending Eye Brush and e.l.f. Studio Small Smudge Brush - 1$ each
I am super happy I found some more eye brushes! You can never have enough, you know. e.l.f brushes were the first brushes I ever bought, and I still really love their blending brush. It is one of my favorites. It does what it's supposed to do. I didn't own a smudger brush before now, so I'm really excited to add these to my collection!


Funky Fingers and Fresh Paint nail polishes in Puffo Gelato, Partly Cloudy, and Square Candy - 3 for 5$
These were the only things I did not get at the dollar store. I got them at the almost dollar store haha. I just discovered Five Below. I don't know how, but literally I figured out this place existed the day before I bought these. I've seen Funky Fingers on IG, and I've always wanted to try them out.


Well that's everything! I will try to do a makeup look using mostly dollar store products. That should be easy after this haul. ^-^ Make sure you check my YouTube channel to see if I've uploaded any new videos.

Kiss, Kiss.
-A

Sunday, November 17, 2013

Review Post - Ipsy Glam Bag November 2013

I have been waiting all week for this to get here!!!! I was super excited to get this bag this month. It was amazing. I did an unboxing of this bag the day I got it. You can check that out here if you'd like. The video quality is kind of crappy, but I'm working on that haha. Anyway, since I did the unboxing the day I got it, here is my review of the products.

The Goods:

Alright, let's start off with the bag. It is super cute this month! It's gotten mixed reviews from other subscribers, but I personally am really loving it. It's completely different than the other bags we've gotten this year, at least since April's bag. I love that it has the little strap so you can actually use it as a clutch. I will absolutely get some use out of it.


First product I pulled out of my bag this month is the Starlooks Gem Pencil in the shade Topaz.
"Starlooks' extremely popular Gem Eye Pencils are created with a magnificent metallic finish and are so versatile, soft, and creamy that they can be easily used as liners as well as eye bases! Each highly-pigmented, unique pencil has a gorgeous, micro-glitter finish. Available in 6 brilliant glistening shades."
I really wanted Amethyst, but this liner is so dang pretty! I will absolutely be getting some use out of it this holiday season. I goes on fairly smoothly and the color pay off is phenomenal! It is a tiny bit patchy but that's nothing another small swipe can't fix.
[]Pass [X] Buy


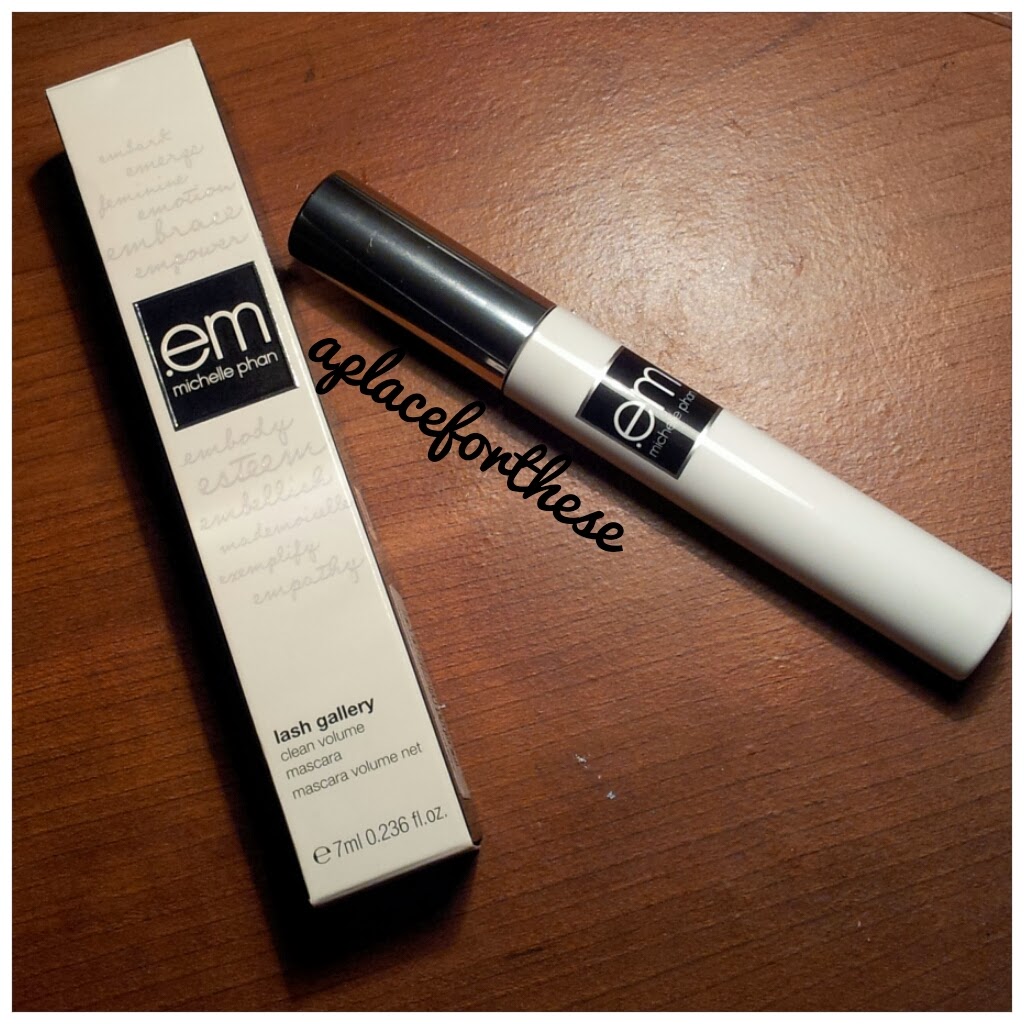
Next is the Em Cosmetics by Michelle Phan Lash Gallery Dramatic Volume Mascara in black.
The website has no description for the product, but it does have several reviews that are good. The overall rating is currently 4/5. I would probably give it the same rating. It doesn't give as much volume as I would like, but it lengthens pretty well for me. I am disappointed to have gotten yet another mascara in my bag. I would rather have had the lip balm or the liner, but a free full sized product is a free full sized product!
[X]Pass []Buy


I also received the Be a Bombshell Lip Crayon in the shade Shameless.
"Burgundy – A burgundy with shimmer"
I was soooo excited to get this and try it out. I really have been loving lip crayons lately. They're easy to use and store, and they usually stain, which makes them long lasting. The color is this is beautiful and perfect for fall. I am definitely excited to be adding this to my collection. The lasting power is pretty good too. I wore it to work the other day and it was at least 4 hours before I had to reapply.
[]Pass [X]Buy


My "or" product this month was the GlamGLow YouthMud Tinglexfoliate Treatment
"This mud mask leaves skin noticeably radiant and glowing. It works with the body's natural moisturizing collagen to provide gentle resurfacing exfoliation and helps to leave skin smoother, brighter, and softer. While providing tighter skin texture and tighter pores, it provides a more youthful appearance and absorbs impurities without removing natural oils. "
This stuff is bomb! It feels freaking amazing on your face! Its gritty so you can exfoliate with it before or after you let it set. It also has the pieces of tea leaves in it that give it an interesting texture. If it wasn't so expensive, I would buy gallons of this stuff!!!
[]Pass [X]Buy


So part of the reason I initially signed up for Ipsy was to get nail polish and cosmetics. They tend to give out Nailtini, but since my first bag way back in April, I have gotten none until this month!!! I got the Nailtini Straight Up Color Lacquer in the shade Champagne. I was really hoping to get the silver colored one, so I swapped with my friend Amber for the silver. The formula is good, but the color looks washed out against my skin. This swatch is 2 coats. 
[X]Pass []Buy


The last product from this month's bag is the Pixi Beauty Bronzer in the shade Summertime. I am super excited to have another bronzer! I've been using the Milani Baked Bronzer in 06 Golden and I really love it. The only problem I have with it is that it's shimmery. That was fine when I bought it at the beginning of summer, but not that winter has set it I really want something more matte. The Pixi bronzer is matte and the color is dark enough for my skin! Yay!! It doesn't give me a crazy bronze/contour, but it does the trick. If there was one they offered just a shade darker it would be perfect.
[X]Pass []Buy


Price Summary:
Starlooks Pencil (FULL SIZE)- 14.00
Em Mascara (FULL SIZE)- 20.00
Be a Bombshell Crayon (FULL SIZE)- 14.00
GlamGlow Mask - 20.29
Nailtini (FULL SIZE)- 13.00
Pixi Bronzer - 5.64
Total: 86.93!!!!!!!

I will definitely try to film a look using the products in the bag. We will see how that goes haha. This whole filming thing is hard, but be sure to check my channel for a video! Overall, I really loved this month's bag as far as size, selection, and value go. I cannot believe how much we got this month! If you'd like to try out Ipsy, click here to take the style quiz and get started with your first bag! Thanks for reading.

Kiss, Kiss.
-A

Friday, November 8, 2013

Nail Post - Simple and Easy Pictorial

I'm back again with a nail pictorial! This mani is a bit more appropriate for February, but obviously, I don't care! It only takes 3 colors and a glitter top coat. Let's get started.

Supplies

  • Base Coat
  • White Polish
  • Black Polish
  • Red Polish
  • Glitter Top Coat
  • Glossy Top Coat
  • Matte Top Coat
  • Dotting Tool, Toothpick, or Bobby Pin

Step 1: Apply 1 coat of your favorite base coat. As always, I'm using Sally Hansen Hard As Nails.

Step 2: Apply 2 coats of the white polish to your first and third fingers, 2 coats red polish to your second finger and thumb, and 2 coats black polish to your pinkie. White: Chinaglaze White Out. Red: IBD Nail Lacquer Bing Cherries. Black: Wet N Wild Black Creme.


Step 3: Using a small dotting tool dipped in black nail polish, start making small "v" shapes on the nail using a stippling motion. Round off the edges to make a heart shape. Add dots in the empty white spaces.


Step 4: Apply 1-2 coats of your favorite silver holographic glitter top coat to your first finger. I used OPI Which is Witch? from the Oz Collection.


Step 5: Taking your dotting tool again, make one large heart in the center of your first fingernail using black nail polish.


Step 6: Use 1 coat of matte top coat for your pinkie nail. (Julep Matte Top Coat)


Step 7: Use traditional top coat for your other nails, and clean up the edges! (Julep Freedom Polymer Top Coat)


Then you're done! I really hope you all enjoyed the tutorial. Leave me a comment with any suggestions or ideas you'd like me to try out for you guys.

Kiss, Kiss.
-A


Monday, November 4, 2013

Nail Post - New Julep Subscription

So because I love nail polish, I ended up getting a second subscription to Julep for a while.
My main subscription is the It Girl profile, but I also really like trying out the other products Julep comes out with. So for this new subscription, I got Boho Glam so I could get the best of both worlds.

Here's what I got!

Tatiana
Julep describes Tatiana as a "golden burnt orange microglitter" polish. She is absolutely gorgeous! She does go on a bit sheer for my liking though. This is a polish I would use 3 coats for. Against my skin, this polish looks amazing. It really looks warm and inviting and wintery.


Kristy
Kristy is described as a "midnight blue creme". The polish is soooooo blue! And so glossy! I love it! Blue is my favorite color so I was instantly drawn to this color. You can't even tell it's blue until it's on your nails. In the bottle it looks black.


Luxe Repair Skin Serum
"This rejuvenating serum delivers deep hydration and essential nutrients to help rebuild skin structure from the inside out—for a noticeable difference in the way your skin looks and feels. Designed for all skin types, Luxe Repair can be used as a daily treatment or moisturizer for face, hands, or body."
When they say this is lightweight, they really mean it! It is runny and thin, but it is very hydrating. It's also fast absorbing, which I like, but make sure you use a little at a time. Otherwise, it'll be gone by the time you get to rubbing it in. 


That concludes this post! If you want to try out a Julep subscription, just click here. To try it out for just the cost of shipping, enter in the code FREEBOX at checkout. 

Kiss, Kiss.
-A

Saturday, November 2, 2013

Nail Post - Beginner Nail Design Pictorial

Hey, hey! Welcome back! So today I have a super easy nail design for you guys.
It's kind of a chevron mani, but not really? I'm not sure how to explain it lol.
But just read on and see for yourself.

Supplies:

  • Base coat (Sally Hansen Nail Hardener)
  • Watermelon Red (Essie Big Bag Theory)
  • Bold Purple ( Julep Eden)
  • Silver (Herrmann Nail Lacquer)
  • Silver Glitter Top Coat
  • Matte Top Coat (Julep Matte Top Coat)
  • Dotting tool, toothpick, or bobby pin

Step 1: Apply one coat of base. 


Step 2: To your all nails except the third, paint with the red color. Paint the third  fingernail silver. 


Step 3: Paint a modified french tip in the shape of a V to all of the nails that are red. 


Step 4: Using your dotting tool, make five dots along the edge of the french tip. Apply 1-2 coats of the glitter top coat to the silver nail. 


Step 5: Apply the matte top coat to all the nails. 


Step 6: Clean up around the nails, and you're all done!


That's it! Thanks for reading. Check out my other nail posts and things on my Instagram here.

Kiss, Kiss.
-A